My 5 Favourite Crochet Tricks

While there are many guides to the basic crochet stitches, it can be harder to track down some of the more interesting techniques that can add the little extra polish to a project. Craft learning has really brought home to me the concept of ‘you don’t know what you don’t know’. Without even knowing that a term or technique exists your only hope of learning it is to discover it by accident or by reading some technical books that happen to have it. So, in the hope of helping someone else discover a new treat, here are my 5 favourite crochet ‘tricks’.

1. Foundation Stitches

Even in the few years that I’ve been crocheting these have become noticabely more widely known. Basically, instead of chaining and then working your first row of stitches back over the chain you create the chain and the first row at the same time. The advantages of this technique are that

  • the starting edge is stretchier,
  • you don’t need to worry about your chain being too long or too short
  • and the chain can’t get twisted.

The video below shows the technique used in a row of single crochet, but it can be used for any starting stitch with some tweaking. It made a lot more sense to me once I got that I first make the chain and then I make the actual stitch, once you get that you can work out how to work a row of foundation stitches in pattern.

2. Continuous Motifs

This is a technique I first stumbled across in Edie Eckman’s Connect the Shapes Crochet connect-the-shapes-crochet-motifsMotifs and it’s a way of making motifs without ever breaking the yarn. It’s like a super upgraded version of join as you go (another great trick). It’s very hard to explain, especially without a full photo/video tutorial, but basically you ‘replace’ some of the stitches with chains as a way to sneak in the middle of the motif, then you work as normal until you get back to your chain where you do your slip stitch join. But! Then instead of chaining up for the next row you slip stitch back up your chain to start the next row. Adjacent motifs are picked up with one of the standard join-as-you-go methods. There are two tricks that make this continuous technique work:

  • on the last slip stitch up the top you have to do a cross over slip stitch, it’s hard to explain but you keep the working yarn to the back and put your hook on the left most loop of the chain and work you slip stitch, this leaves you on the left hand side of the chain ready to keep working
  • you need to leave some of the last row of each motif unworked, you then use these as a path back to the beginning, think of those brain teaser puzzles where you have to make shape connecting the dots without retracing a line.

A big limitation of this technique is that it really only works in one colour. The need to leave a pathway back means that using a variegated or colour change yarn will leave that section the wrong colour. Changing ‘manually’ to a differently coloured yarn will increase the number of ends per square, which defeats the whole point. But for single colour pieces this technique is a real time saver. It’s also such an uncommon technique that this was the closest to a tutorial that I could find: http://fionitta.com/2013/crochet-lillipop-rug

3. Using Elastic as a Foundation Chain

One of the challenges of crochet is getting a fabric that can stretch. There are tricks (bp/fp or bl sc ribbing, the above mentioned foundation stitches) but they’re still not that stretchy, just stretchier. This can be a drawback for working hat brims, sock cuffs and tight fit headbands. Then one day a friend of mine gave me crocheted hat she’d bought at a market; there was no foundation chain, the first row was worked over a colour coordinated piece of elastic, and I thought to myself that’s bloody brilliant. Now, the total stretchiness is still limited by the main fabric, but crowding up stitches or having a few rows of a lacy type fabric can go a long way. The same technique is used to make this hair-tie, now how’s that for stretchy!

4. Magic Circle

The magic loop, or magic ring is a way of starting a crochet circle that doesn’t have a hole in the middle. Knitters take note: this is different from the knitting technique known as magic loop but is the same as the start of Emily Ocker’s Circular Cast On. Basically you make an adjustable loop, work your first row into it and then pull it tight to close it. It’s fantastic for toys and top down hats.

5. Invisible Decrease

This is another technique that avoids holes and is essential learning for making toys (at least in my opinion). Rather than working the usual sc2tog you thread you hook through the front loops only of the two stitches being joined (both form front to back, it takes some finagalling) and then finish the stitch as for a normal sc.

So there we go, 5 of my favourite things I’ve found in the deeper seas of the crochet world. If you’re thirsty for more of them check out Eddie Eckman’s Crochet Answer Book and for toy (amigurumi) tips the illustrious June Gilbank of Planet June is hard to beat.

Posted in Uncategorized | Leave a comment

Happy 2015!

Happy New Year!

I can’t say I ever want to go through the year that was 2014 again, but there were some highlights.  I learnt to dye and spin which has been fantastic fun, I’ve gotten much better at precision hooping in my machine embroidery and in sewing I used my non-stick foot for the first time which was much easier to use than a piece of paper over the difficult, sticky fabric.

I did not, however, do much in the way of blogging.  I hope to change that up a bit in 2015. I have at least gotten better at taking photos as I go so I have a backlog of projects I can blog about 🙂

Here’s some of those photos with almost no context at all 😛

Posted in Uncategorized | Leave a comment

Adventures in Spinning

Wow, I haven’t posted in ages.  Since that time I’ve taken up a new hobby: spinning.  Like many first timers I started out with a drop spindle.

Basket of spinning goodies IMG_0125 

This particular one is the Ashford Classic and weighs in at 90gms (about 3oz).  I’ve named her Big Bertha as I now realise she’s about as heavy as drop spindles come and the weight of your spindle actually affects the thickness of the yarn that you can spin. Basically, the heavier the spindle the thicker the yarn needs to be so that it can support the weight of the spindle itself.  Teeny tiny thin thread is actually spun on supported spindles that rest on a surface, usually a bowl, so that the thread can be spun without needing to be able to hold up the spindle.  Apparently most people use Bertha weight spindles only for plying (twisting already spun singles together to make a more stable yarn).  But, I love the super chunky yarn I spun up on her and plan to make a giant shawl using 25mm needles and one of these adjustable shawl patterns.

Fist handspun skein

Also, as many spinners eventually do, I have acquired a wheel.  Two, infact.  The first wheel was $60 secondhand and unfortunately doesn’t work once there’s yarn in the equation.  Also, she’s an out of date model so I can’t easily order a replacement for the not so useful homemade fixed bit with which she came.

IMG_0126
IMG_0128
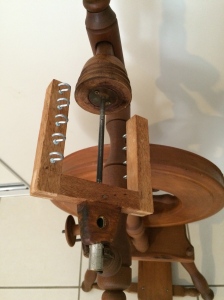
That mismatched bit is called the flyer and it spins superfast (good) and then jumps off (bad).  The general advice to new spinners (that I heard later) is to avoid handmade or discontinued wheels as replacement parts are hard to find.  It’s good advice.

So now I have a new shiny wheel as a combined birthday/Christmas/everything gift from my very generous grandmother.  This model is an Ashford Joy2 and is designed for portability and has a great carry bag option.  Fortunately years of playing cello in school have left me with a high tolerance for carting baggage around.

There’s not a lot of spinning wheel dealers here in Oz so the brand choice was pretty simple (Ashford or order online with crazy shipping costs and little to no actual dealer support).  Model wise I chose the Joy2 as it packs away very well and so is safe from sticky little people fingers.  Also the wheels that offer more versatility (such as the Traditional which can be upgraded left right and centre) aren’t as portable, and I really wanted something I could take out with me or easily cart along to guild meetings.  The first time I packed it up and put it in the back of the car I knew I’d made the right choice.  It’s also handy to be able to keep it packed away from the kids.

Here’s some more of my early spinning efforts:

IMG_0088IMG_0129

My next challenge is to find something I can make with such small amounts of wool…

Posted in Uncategorized | Leave a comment

New Project: Oriental Lily Dress (maybe a tunic, haven’t decided yet)

The finished bodice for the Oriental Lily dress with Moda Vera Playful in pink colourway

Even though I still haven’t finished so many of my WIPs, I’ve started a new project for the Winter.  I’m following Georgie Hallam’s free pattern for her Oriental Lily Dress.  It’s a lovely, simple design both to knit and to look at.  It would be great for a new-ish knitter looking to make their first garment or for someone looking for a quick and low key project to take to a knitting group or work on while watching TV (or someone who like me is sleep deprived due to the extended and combined efforts of their children).  Based on a Japanese aesthetic, it can be worked as a dress or tunic has a simple A line shape with a crossed bodice and a mock obi sash.  The pattern is worked from the top down using only simple stitches and with stitch markers for any increase points.  The bodice is started flat and then joined with an overlap to make the crossover and from there on the obi and the skirt are worked in the round.  The stitches for the sleeves are passed on to waste yarn and worked as ‘afterthought’ sleeves, so there’s no seeming anywhere – which is wonderful.

Completed bodice for the Oriental Lily pattern

I’ve just finished the bodice and started the first few rows of the obi and I’m really pleased with it so far.  The bodice is set up very cleverly in a way where that’s hard to describe, but it folds over itself and you knit 20 or so stitches together the first time you join it into the round. It adds a nice origami feel to this Japanese inspired piece.

Moda Vera Playful, could I have the first die lot?

I’m using Spotlight’s new Moda Vera Playful 100% superwash wool in a pink print with a solid pink for the not so contrasting obi.  This wool is so new that at the time of writing it isn’t even on Ravelry yet. My dye lot is 1001 and so could possibly be from the first lot ever.  I like the wool in general, but for some reason the colour range is just a little off.  The prints are warm toned while the solids are cool and so it’s hard to get a nice contrast together.  Otherwise it works up nicely, feels soft enough to wear next to the skin and has that nice 100% wool spring to it.  I think it would make lovely toys.  I let my daughter pick her own colours and shouldn’t have been surprised that I’m working with pink again.

What are your favourite colours to work with?

Posted in Knitting | Tagged , , , , , , | 1 Comment

Toddler Questions are so Cute

Miss2: “Today Tuesday?”
Me: “Ah, today’s Wednesday.”
Miss2: “Wednesday. All day?”

I think she was hoping for a chance of it being playgroup day by the afternoon

This blog pressed using Tinydesk

Posted in Uncategorized | Tagged | Leave a comment

Combodia Knits – Backing my first Kickstarter

An exciting thing has happened.  Kickstarter is now available in Australia!!  Woohoo!

If you’re not familiar with Kickstarter it’s will worth checking out.  It’s an artsy themed crowd funding system. Which means that if you have a project (a pattern, a product, an art installation) that you want to ask people to give you money towards, this site helps you do that.  Usually people then get something in return for the amount of money that they pledge to the project but sometimes it’s more about being a part of making something happen.  It’s a very cool thing.

So, after going to Kickstarter’s presentation on Monday night I felt I should finally get around to supporting a project that I like.  In the lingo of Kickstarter this is called ‘backing’ and I am now a ‘backer’ for Cambodia Knits: Crocheting for Good.  At the level I pledged at I get a crochet pattern and help one of the most beautiful places in the world that has also been terribly damaged by war.  How awesome is that?!?


So, have you ever used Kickstarter?  What did you back or even what was your project?

Posted in Crochet, Kickstarter | Tagged , , | Leave a comment

Savoury Muffins

Savoury muffins

These muffins are my absolute favourite easy go-to recipe.  One part self-raising flour, one part grated cheese, one part milk and then extras and seasonings to taste.  They freeze and can be made (apart from the milk) entirely from products with a long shelf life and by changing the ‘extras’ you can keep up a nice variety.  They’re great warm, cold, on their own or with butter and chive seasoned sour cream.  They’re like the little black dress of baking.

Using a standard 250ml cup as the one part makes six largish muffins, but you can use any size cup or as many cups as you like, as long as you use the same for each key ingredient.  Also, this mix is very forgiving with the extras.  I’ve only had to tweak it for wetter extras like tomato paste or mashed pumpkin.

Recipe:

  • 1 part self-raising flour
  • 1 part grated cheese
  • 1 part milk
  • savouries and extras as desired

Mix dry ingredients in a bowl, then add the milk and any other wet ingredients.  Spoon mixture into muffin trays and bake at 200C (390F) until golden brown on top, around 15mins.

Our favourite seasoning/extras combos are:

Basic

  • Diced bacon
  • Corn (canned or frozen work fine)
  • Parsley
  • Onion Flakes

Italian

  • Oregano
  • Basil
  • Garlic
  • Tomato paste
  • Only 3/4 to 1/2 the milk as the paste makes a runnier batter

Chicken

  • Diced cold chicken (great for leftovers from a store bought roast chicken)
  • Sage
  • Thyme
  • Garlic

Spinach

  • Frozen spinach cube (defrosted)
  • Bacon
  • Garlic
  • Onion flakes
Posted in Cooking | Tagged , , | Leave a comment

Pattern Review and Project Complete: Mario

yarma_medium2 (2)

Huzzuh!  After spending nearly six months in a project bag, Mario has finally been finished 🙂  He’s meant to have buttons on his bracers, but as he’s a gift for a very little person I’ve left them off.  Stitching together amigurumi is still something I need to work on, so check out the great version by the very talented designer before making a decision on the pattern as I can assure your the slightly odd angles, disproportionate limbs and crazy eyes are entirely my fault (he does look better in person though, the eyes are less, weird).

So, about this pattern.

Review:

  • Name: Mario Plushie
  • Designer: WolfDreamer
  • Medium: Crochet (Amigurumi)
  • Cost: Free!
  • Skills needed: single crochet, magic ring, invisible decrease, working in the round, basic colour changing, applique, amigurumi assembly
  • Difficulty: Intermediate (None of the stitches are hard, but he has a lot of small, symmetrically placed parts, so if you add too many or few rows or don’t have consistent tension it’s easy to end up with mis-matched bits.  Also, the many bits means a fair bit of sewing together)
  • Availability: On WolfDreamer’s blog here: http://wolfdreamer-oth.blogspot.com.au/2009/08/mario-plushie.html
    or here on Ravelry: http://www.ravelry.com/patterns/library/mario-plushie
  • My Rating: 4/5

I really liked this pattern and enjoyed making Mario.  As this is my first review I don’t want to blow the full five stars too early.  As a pattern offered for free, it is amazing.  For me the best bit was finishing the ears.  The pattern reads “F/O and tie the 2 ends together creating a slight curve (ear shape)” and I remember being amazed at how this little half circle-ish thing suddenly became a very real looking ear.  It was both awesome and freaky at the same time.  For many months I had all of the face bits tied together by their yarn ends as I kept putting off the final assembly; the lifelike ears gave a really macabre feeling to my little bundle.

Here are some more pictures of Mario while on his way to finished.  In the first one where he had a face but no limbs Miss2 was totally convinced that he was duck.

yarma_medium2 (3)

yarma_medium2 (1)

This was my first time pre-pinning the pieces of an amigurumi.   I have absolutely no idea why it hadn’t occurred to me until I read it in this pattern as when machine sewing I tend to pin like a mad woman (though I am getting better, and starting to use an overlocker more is doing wonders to break the habit).  It did help a lot, especially with placing the face bits.  Unfortunately I got into a bit of a frenzy to finish the project towards the end and didn’t lock down the arms as much as I needed too.  That and I got sick of cutting little felt eyes that kept fraying in odd ways and made a decision to just pick the best pair and blanket stitch them down already!  I think being more patient, having longer pins and a curved needle would have helped (note that this advice is here and I ignored it to my own peril).

Tips:

  • Do the pinning thing on the way to sewing up.  There are a lot of symmetrically placed pieces and so errors in placement really stand out.
  • Don’t try this as your first amigurumi, try something with fewer pieces first to get the hang of assembly (check out PlanetJune for some tips).
  • Make sure the eyes are oval and not round or he looks really insane, trust me.
  • Stuff the head very firmly, I left mine too soft and didn’t realise until trying to stitch on the face bits.  It worked out ok in the end, but a bit firmer would have been nice.

Overall this was a great pattern with clear instructions, but the assembly is not for the faint of heart.  I very much recommend giving it a spin for the Mario fan in your life.  Also, check out some of WolfDreamer’s other patterns while you’re on her site.  There’s a range of free fan art patterns for Mario (and his friends), Pokemon, Sonic, the Penguins from Madagascar and more.

So, what’s your favourite piece of fan art/craft?  Do you manage to stay patient until the end or do you get the ‘nearly finished crazies’ too?  What are your tips for assembling amigurumi?

Posted in Amigurumi, Crochet, Pattern Review | Tagged , , , , | Leave a comment

Quilts 1700-1945 at the GoMA

Quilts 1700-1945 at the GoMA

Maker unknown | Central section from a printed cotton patchwork coverlet showing King George III reviewing the troops 1803-05

If you are at all interested in quilting or embroidery and are around South East Queensland, I highly recommend making the trip in to see this exhibition.  It took me about an hour and a half to get through, and that was with reading every description, watching all of the interactive tour videos on my iphone and leaning over clumsily and kneeling on the protective barrier to get a closer look at the stitching.  If you have smartphone do download the app for the video tour, it’s amazing.

I have to say that it has totally changed the way I view quilting and crafts in general.  The exhibition shows not only pieces that display incredible skill, but many pieces that are incredible artefacts of emotional value or political expression.  Mostly I assess quilts on their beauty or skills used in construction, but from this collection the two quilts that had the most impact on me were very simple and one was not even completed.

The Changi quilt was made as a birthday gift by little girls in a Japanese POW camp during WWII for their Girl Guide leader.  Yes, you read that right.  While enduring incredible hardship and appalling conditions, Elizabeth Ennis decided to start a guide group. It is made  from thread unpicked from hems and patchwork pieces cut from fellow prisoners’ clothes.  Never fully completed, it is an amazing example of courage in the face of oppression and adversity.  If you have the app running you can see an interview with Olga Henderson (who is now in her 70’s or 80’s) who is the last remaining survivor of the girls who made it.

My favourite quilt was a very simple 9-patch in yellows and greens tied together with red thread.  It was a gift to a little girl from the Canadian Red Cross after her family returned home from holidays to find their London home had been destroyed during the blitz.  At the top of the quilt you can see wear marks from where the girl used to rub it for comfort during the bombings.  As someone who occasionally sends finished objects along to charity groups and wonders where they end up, this piece really touched me.

I felt that the exhibition really captured the greater role of quilts as examples of wealth and skill, expressions of the intellect and views of the maker and a source of comfort or shared effort.

The exhibition will be installed until 22 September 2013 and costs $15.  There’s also a deal where you can get a ticket and a Patchwork Lunch for $30.

Have you ever had a real ‘penny drop’ moment from crafting?  What was it?

Posted in Embroidery, Quilting | Tagged , , | Leave a comment